1914 Waltham 8-Day Car Clock with Wind Indicator

Waltham Car Clock Front

When I said I was done with larger pieces for a while, I was clearly lying to myself. Oversized watches are fantastic pieces to work on and learn from. Once you get past just how dangerous the larger mainsprings can be, and gain a healthy competence for uncoiling said mainspring safely (I do it by feeling with my hands under the bench to prevent anything from flying about), these are amazing pieces to service and see in action. Their oversized parts are also great for learning about complications for the transition to smaller pieces.

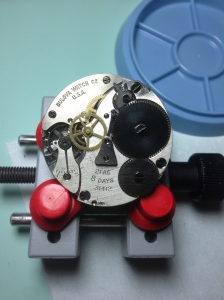
This vintage 8 Day Waltham Car Clock was two firsts for me. It was my first vintage Waltham, and it was my first power reserve. This clock came in a very heavy protective case that was meant to insulate it from the elements it would face serving as a car clock in 1914. Once I finally figured out how to access the movement, I was enchanted with both the size and the decoration on the back. The movement ran but only for a short time. Generally this is an indication that a thorough cleaning is in order to clear away dried up grease and oil in addition to dirt and dust that may have crept in during the years. Once a cleaning has taken place, the parts can be inspected for the wear and tear that comes with being part of a low-jeweled movement.

Waltham Car Clock Movement

As I disassembled it I saw some of the telltale signs that this watch was hugely overdue for a service like the black grease under the mainsprings. Additionally, the balance moved sluggishly and with poor amplitude. Once it was fully disassembled, I laid it all out and began cleaning and inspection.

Before Cleaning

Before Cleaning


After Cleaning

After Cleaning

Waltham managed to achieve the 8-Day reserve by employing two mainsprings. So it wasn’t just one dangerous oversized spring I had to deal with, but two! My cautions about larger mainsprings not said lightheartedly. A while back, I had one of those humbling “learning mistakes” that has indelibly marked my respect for this component on watches/clocks. As I was uncoiling a fully wound 8-day Seiko wall clock with an exposed mainspring, the unwinding key slipped from my hand causing the mainspring to instantly release its energy. The incident left me with four bloodied and bruised knuckles and a week or so off the bench to heal. Needless to say, I am very careful taking larger mainsprings apart.

Two Large Mainsprings

Two Large Mainsprings


Mainspring out of the barrel fully uncoiled

Mainspring out of the barrel fully uncoiled


Some assembly Required...

Some assembly Required…

All the parts looked good so I got the mainsprings greased and recoiled and began to put everything else back together. With all the pieces back in place, and the movement running like a charm, I regulated it before setting the wind indicator in place. There is a particular convenience to these clocks in that they do not need to be regulated to multiple positions, just the position in which you plan to mount it.

The final test was to let the clock run for seven days to measure its long-term accuracy. It was during this time on the bench that I came to appreciate both its aesthetic and its application.

As someone born during the digital age, the idea of a manually wound car clock was beyond comprehension. Quartz was king by the time I was around and as a result the idea of a beautiful mechanical timepiece being part of your car was long gone. With that also went some of the more detailed design work like the large oddly shaped steel case-front. At a certain point we traded convenience for craftsmanship, and while I couldn’t imagine having to wind the clock in my car, I’m sure the people who did so couldn’t imagine having to charge a computer, smartphone, or any of the other maintenance routines for our gadgets that came since. I am torn between the two. I love all my modern gadgets and all the benefits they bring (like this blog) but I also love that there are beautiful mechanical wonders like this clock from generations ago. I might be overly nostalgic, but I do not see someone in a generation or two being excited about restoring my iPhone or any thing else of the period that I might leave behind. This clock on the other hand is a beautiful relic from the turn of the century where it lived in one of the very early automobiles that would soon remake our world.

Waltham Car Clock Side  Waltham Car Clock Feature

World War II Hamilton 37500 Cockpit Clock

Hamilton 37500 Front

The most rewarding projects in watchmaking are the ones you know are way beyond your depth, yet you try anyway (and most importantly succeed.) This Hamilton 37500 aircraft clock was undoubtedly the hardest and most complex piece I have worked on to date.

This clock was one of the most complicated pieces ever made for military aircraft and as such has a huge amount of parts. To avoid too much clutter and confusion, I decided to familiarize myself with the movement and find the problem by disassembling and reassembling it in segments.

The first goal was to replace the balance complete. I knew that this was not working because the balance staff was broken. Once that was done it ticked but stopped. Something more serious had to be going on so with that in mind I went about the rest of the process.

I first disassembled the mechanisms on the front. This included the civil date, date jumper, and the elapsed timer. Once I got all of these properly cleaned I oiled and reassembled them, I then wound up the movement, and although it ran it still stopped after a short time. The problem was not with the front.

I the set about taking the back mechanism, which was the chronograph. Here I noticed something was awry. There was way too much play in the fourth wheel (the gear that drives the second hand and by proxy the chronograph. A closer look revealed that the jewel that holds it had been shattered causing it to tilt and stop the movement.

IMG_1916

Fortunately I had a harvester movement on hand. Although expensive, it was no where near as expensive as a service for one of these (almost $1200.) The harvested back plate was perfect and after swapping those out the movement worked perfectly.

Next I disassembled the entire clock. Ultrasonically cleaned everything and got it all back together. Although that only took two sentences to describe, it was way more work than the few words might suggest. After oiling and regulation I made sure that it runs properly through the full 8 day wind. A timing machine can only tell you half the story with large capacity mainsprings so it is always important (although time consuming) to let these clocks run through.

IMG_1912 IMG_1903

Pieces of WWII history like this are always a touch more rewarding than regular restores and come with an extra sense of pride. As does being able to restore such a complicated piece. That being said, it’s back to smaller pieces for a little while.

Hamilton 37500 Front Hamilton 37500 Angle

Hamilton 37500 Tilt Hamilton 37500 Back


WWII 8 Day A-11 Cockpit Clock

Usually the watches I work on are too small to be able to clearly photograph a restore in a way that actually shows the problems and the work rather than what appears to be some arbitrary pictures of a watch taken apart and put back together. Fortunately this 8 Day Bulova Aircraft 21AE movement was monstrous enough to be able to show the full process and the problems along the way. The picture quality is much lower than typical posts, but that is because I used my camera phone to avoid constantly having to set up light box and use the professional camera.

Before I walk through the restore, Here is a brief background on the significance of this clock:

There were three makers of these particular 8 day clocks: Elgin, Waltham, and Bulova. Far and away the rarest to find are the Bulova ones. I am not sure why this is but observation has shown that they pop up less frequently than the other two. These 12 hour clocks were used in the cockpits of B-17s and B-29s during WWII. Named the A-11 they matched the name of the accompanying wrist watches also used by pilots of the time.

Now on to this clock:

Not only had this clock been through WWII, but also perhaps worse, someone clearly unqualified to service it tried nonetheless. Now I do not consider myself an expert nor do I believe I possess any special skill in the realm of watchmaking (other than a love and respect for the craft), but opening this movement up made me realize that I am at least better than some.

Taking this piece apart it became quickly apparent that this was going to be a dirty movement as the close ups show. The oil had crusted up with some dirt to form a gear-stopping grime wherever it had been applied. Over time dirt and lint had made their way in and caked on to whatever parts they could.

To put the size of this movement in perspective, the first photo is the mainspring barrel of the 21AE (left) next to the barrel of an average wrist watch. This is truly a hybrid between a watch and a clock movement and provides a great format for walking through a restore.

21AE mainspring barrel    21AE Disassembly  21AE zoom 21AE disassembly zoom  21AE filthy escarpement

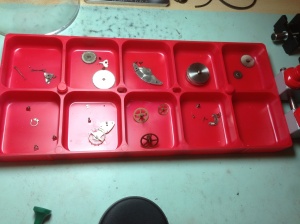
After giving this entire movement a thorough trip through the ultrasonic cleaner I began the part observation. This is where things got really messy (and annoying.)

21AE Parts Tray

The wheel train bridge (the part that reads Bulova Watch Co.) that holds the escape wheel (the odd looking little wheel in the fifth picture) and the fourth wheel (the normal looking one next to it) had been put on with so much force and with the fourth wheel so far out of alignment that not only had the fourth wheel pivot been badly damaged, but the train itself had been irreversibly damaged. The damage caused the fourth wheel to cock to the side and halt the movement. This unfortunately required the purchase of a new “harvester movement” for the wheel and the train bridge. As the 21AE hasn’t been made for years, I was incredibly lucky to find one.

21AE Main Plate 21AE reassembly 1 21AE reassembly 2 21AE reassembly 3

Finally with the new parts I was able to finish the reassembly and place the balance complete in for that magical moment when the whole thing comes to life.

After finishing up the reassembly, the movement looked much nicer and cleaner and was ready to be reinstalled:

21AE assembled

Finally, once regulated, I fit the dial and hands, and fixed it into its case and for the first time since it arrived it looked and functioned like the amazing piece of military history that it is.

21AE complete